Jumping into indirect grilling opens up a new world of possibilities for anyone who loves barbecue but isn’t quite ready for low-and-slow smoking just yet. When I started, I felt a little lost with all the talk about two-zone fires, heat management, and what gear was beneficial. The good news is that indirect grilling is easy to master with a solid to-do list, allowing you to serve juicy, evenly cooked meals without burning the outside or drying them out. Here, I’ve pulled together my complete beginner’s checklist so you can tackle indirect grilling like a pro, even if you’ve never done it before.
Understanding Indirect Grilling: The Basics
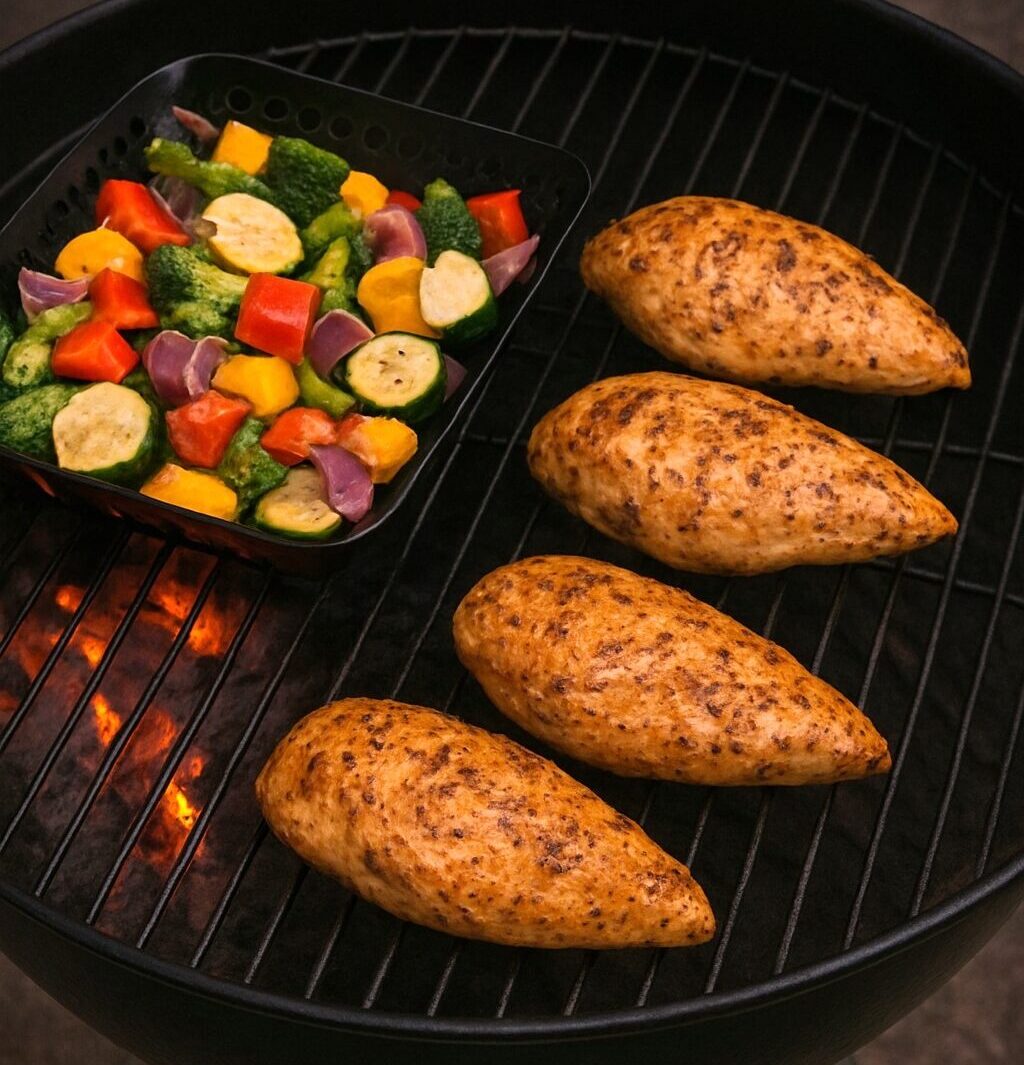
Indirect grilling is a versatile process that anyone can master. It’s all about cooking your food next to, not directly over, the heat source. This method works well for bigger cuts of meat, baked potatoes, whole chickens, and even desserts. Instead of charring the outside while the inside remains raw, indirect grilling gives you a gentle, all-around cook that locks in moisture. Most backyard grills can be set up for indirect heat, and you don’t need fancy equipment to do so. With a few simple steps, you’ll be on your way to serving up a wide variety of delicious, evenly cooked meals.
There are a few terms worth knowing right from the start: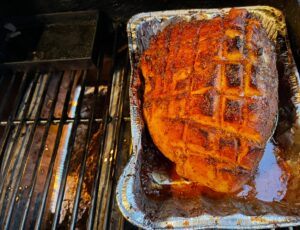
- Two-Zone Cooking: Setting up one side of your grill for high heat and the other for low or no heat.
- Drip Pan: A pan placed under the food in the cool zone that catches grease and juices, making cleanup much easier.
- Vents: Adjustable openings that control the amount of oxygen entering your grill. This helps with temperature management.
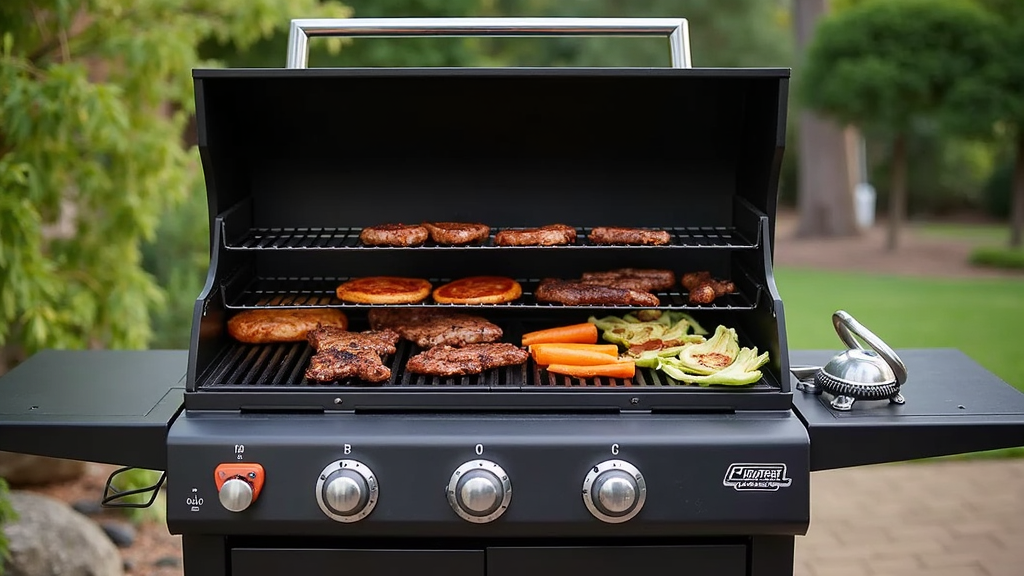
This method isn’t just for charcoal. Gas grills can also use indirect heat by simply turning on one or two burners and leaving the others off. Getting comfortable with switching your grill setup opens the door to a wide range of recipes that you can’t make with direct grilling alone.
Step-by-Step Beginner’s To-Do List For Indirect Grilling
I learned the most by following a step-by-step approach. Here’s my list that I use every time I’m about to fire up an indirect grill session:
- Choose the Right Grill: Any grill with a lid will work: charcoal kettles, pellet grills, or gas grills. A cover is critical as it helps trap heat, a key element in indirect grilling.
- Clean Your Grill Grates: Greasy or crusty racks can compromise flavor and even ruin food. Scrub before heating up.
- Gather Charcoal (or Gas), Drip Pan, and Lighter: For charcoal, you’ll want a chimney starter and a heat-resistant glove. A drip pan helps keep everything neat and tidy.
- Create Two Zones: Push hot coals to one side (or light one side of your gas grill burners). Place your drip pan on the empty side underneath the spot where you’ll put your food.
- Preheat Grill with Lid Closed: Heat your grill with the lid on for at least 10–15 minutes to warm up your cooking zone.
- Arrange Food Over Indirect Zone: Place food over the drip pan or cool side, not over the coals or burners. Leave the lid down as much as possible to avoid heat loss.
- Monitor Temperature: Use a grill thermometer (or a probe if you have one) to keep an eye on both the grill and your food’s internal temp.
- Add Wood Chips (Optional): For smoky flavor, toss a handful of soaked wood chips onto the coals or a smoker box in your gas grill. Great with chicken, pork, or fish.
- Maintain Consistent Heat: Adjust the vents (for charcoal) or burners (for gas) to maintain a steady temperature, typically 250–350°F, depending on the type of food being cooked.
- Rest and Serve: Let the meat rest, tented with foil, for a few minutes after grilling. It makes a big difference in juiciness and texture.
Grill Setup: Gear and Tools to Make Life Easier
Some gadgets aren’t strictly necessary, but they make the indirect grilling process way smoother. Here’s what I keep handy:
- Charcoal Chimney Starter: A fast, safe way to light coals without lighter fluid.
- Reliable Thermometers: Grill temperature probes and instant-read meat thermometers help you avoid under- or overcooking.
- Drip Pans or Aluminum Foil: Any shallow metal pan will do. Foil can double as a DIY pan in a pinch.
- Long-handled tongs and Spatula: So you can flip or move food easily without burning your hands.
- Heat-Resistant Gloves or Mittens: Protect your hands when shifting coals, handling hot grates or when handling tools accessories.
- Cleaning Brush: Helps you quickly clear away debris before and after grilling.
These tools aren’t expensive, and picking them up helped me relax during my cookouts because I wasn’t juggling burning hot pans with regular diner forks.
Common Mistakes Novices Make (and What to Do Instead)
I made my share of rookie mistakes at the beginning. Here are the big ones I’ve seen (and done) and what I’d recommend instead:
- Lifting the Lid Too Often: Keeping the lid closed helps hold in heat and ensures steady cooking. Only peek when needed.
- Piling On Too Much Fuel: Extra charcoal or cranking all burners can make things way too hot. Stick with one layer of coals for low and slow, and only turn on one or two burners if you’re using gas.
- Not Preheating: Throwing food onto a cold grill can cause sticking, uneven cooking, and a lack of color. Allow a solid preheat time.
- Skipping the Drip Pan: Without a pan below, dripping fat hits your heat source, leading to flare-ups, bitter smoke, and a messy cleanup. A simple pan solves all of this.
- Using the Wrong Thermometer: Relying on built-in grill thermometers isn’t ideal because they typically only measure the air high in the dome and provide inaccurate readings. Go for a thermometer at food level whenever possible.
Paying attention to these pitfalls made my early indirect grilling attempts way less stressful and way more successful.
Troubleshooting Indirect Grilling Issues
Even with prep, things can get a bit wild with fire and heat. I keep a few tips in my back pocket for common problems:
Grill Temperature Too High or Low
For charcoal, spread the coals out a bit more or close the vents slightly. For gas grills, adjust the active burner or use only one burner if you continue to experience overheating. To warm up a sluggish grill, open vents and add a few fresh coals if needed.
Food Not Cooking Evenly
Try rotating and flipping the food, or shuffle it between hotter and cooler spots in the indirect zone. A grill-safe baking rack on top of your drip pan can help lift big roasts for more even hot air flow, too.
Lack of Smoke Flavor
If you want smoke and aren’t getting enough, add a handful more soaked wood chips, and stick to milder woods like apple or cherry for delicate meats.
Major Flare Ups
If grease drips directly onto coals or burners, flames are likely to appear. A drip pan placed right under your food blocks this from happening almost every time. If a flare starts, move your food away from the flare and shut the lid to snuff the oxygen briefly.
Practical Ways to Experiment with Indirect Grilling Recipes
Indirect grilling isn’t just about chicken halves and roasts. I started having way more fun once I tried new things:
- Vegetables and Foil Packs: Toss veggies in oil and herbs, fold them into foil pouches, and set them over indirect heat. Sweet corn, potatoes, and carrots get super tender.
- Whole Fish or Fillets: Gentle heat is excellent for fish. I brush fillets with olive oil, add lemon, then place them on a grill tray over the indirect zone. No more broken fish falling into the fire.
- Pizza on the Grill: Lay dough on the indirect side, top with sauce and cheese, then close the lid. It bakes up bubbly and crisp without burning the crust.
- Homemade Bread or Desserts: Baking banana bread, cobbler, or even brownies in a cast-iron pan adds a smoky flavor that you can’t get in a conventional kitchen oven.
Trying small-batch recipes, such as a single vegetable packet or one mini loaf of bread, allows me to figure out grill quirks before committing to feeding a whole party. If you want to impress your guests with something next-level cool, try grilling stuffed bell peppers or even smoking a whole cauliflower with a smoky spice rub. These dishes are great for vegetarian friends and bring a new twist to picnic classics – plus, they soak up flavor wonderfully when cooked over indirect heat.
Temperature Control: How to Master It Easily
Managing grill temperature is probably the trickiest part for beginners, but it’s completely doable once you understand a few simple tricks:
- Use the Vents on Charcoal Grills: More open vents mean more oxygen and higher heat. Closing vents a bit lowers the temperature. Small moves make significant changes.
- Set Burners to Low on Gas Grills: Keep one side on low or off and cook over the cool side. No need to crank the heat for indirect cooking.
- Add or Remove Fuel for Adjustments: Toss on a handful of unlit coals if the fire is dying out. For gas, keep an eye out for a low propane level.
- Keep the Lid Closed: It traps convective heat, just like using the oven. Only open it when you genuinely need to check.
Aim to keep your grill at a temperature between 250°F and 350°F for most indirect recipes. Over time, you’ll develop a sense for how your grill responds to vent adjustments or how quickly it loses heat when the lid is open. If you’re in a windy or chilly environment, consider using a grill cover or finding a windbreak to help maintain those temps. For even more accuracy, you can place two thermometers at opposite ends of the grill to check if your hot and cool zones are functioning as intended.
Pro Tips As You Get More Comfortable
As you get more practice, a few tweaks and habits will help you take things up a notch:
Start with Forgiving Meats: Whole chickens, pork shoulder, and thick-cut chops are exceptionally forgiving for learning because they can withstand longer cook times and still turn out juicy. Chicken thighs are a favorite of mine—they hold up to heat and absorb marinades well.
Keep a Grill Log: I jot down what worked (or what flopped). Tracking the grill setup, weather, fuels, and timing helps plan future sessions and figure out what made the food just right. You may also want to track the types of wood chips or chunks you use to identify which flavors you prefer the most.
Use Digital Timers: Most modern phones now come with built-in timers. Setting alarms for flipping, checking, or moving food helps keep things on schedule and prevents burning or undercooking your meal. You can also use your timer to remind you to check the fuel and vents every 30 minutes during long cooking sessions.
Get Creative with Marinades and Rubs: Since food is cooking more slowly, flavors have time to develop and soak in. Experimenting with homemade spice blends, sauces, and citrus-based marinades made my food go from average to memorable. Try a yogurt marinade for chicken or a coffee rub for pork to surprise your guests.
Try Reverse Searing: Sear a steak or chop over indirect heat first, then finish with a quick blast over the hot side for a great crust and juicy center. This method works particularly well for thicker cuts and can help avoid overcooking the middle.
Use a Water Pan for Moisture: Place a small pan of water in the indirect zone to help keep your grill moist during long cooks. This isn’t just helpful for barbecue—breads and cakes benefit, too, keeping the texture just right. If you’re feeling adventurous, toss in herbs or citrus peels to infuse a subtle aroma.
Frequently Asked Questions for Novice Indirect Grillers
These are questions I hear (and wondered about myself):
Question: What’s the difference between direct and indirect grilling?
Answer: Direct grilling means food sits right above the heat, making it perfect for quick-cooking foods. Indirect grilling places food away from the heat, yielding gentle, oven-like results for items that require longer cooking times.
Question: How can I prevent food from drying out with indirect grilling?
Answer: Don’t lift the lid too much, and use a meat thermometer to check doneness without overcooking. You can also try placing a little water or broth in the drip pan for extra humidity, especially for leaner meats.
Question: Can I barbecue with indirect grilling, or do I need a smoker?
Answer: Indirect grilling works well for many classic barbecue recipes, especially when wood chips are added for an extra layer of smoke flavor. True low and slow smoking takes practice, but indirect heat is a great place to start and can create delicious results.
Question: What foods should I avoid on indirect heat?
Answer: Super-thin or delicate items—such as shrimp, thin burgers, or strips of vegetables—are best grilled directly, as they cook quickly. Save the indirect method for larger or thicker items that require time to finish inside without burning on the outside.
Question: Do I need special grill grates for indirect grilling?
Answer: Not at all. Most standard grates work just fine. Just make sure they’re clean and positioned to give room for your drip pan underneath. If you want to elevate your cooking experience, consider experimenting with cast iron grates, which retain heat more effectively.
Wrapping Up: Jumpstart Your Indirect Grilling Adventure
Tackling indirect grilling as a beginner isn’t complicated. Having the proper routine and tools, and getting a little practice, will help you serve up perfectly cooked feasts time after time. Starting with this to-do list, you’ll save yourself frustration and cookouts gone wrong, and soon you’ll look for excuses to fire up the grill for more than just burgers and dogs. So get out there, try new recipes, and enjoy every moment of your barbecue adventure.
Happy grilling! Enjoy that great BBQ taste!