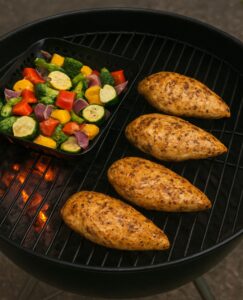
Setting up your grill zone correctly completely changes the way you BBQ. Good heat management isn’t just a chef’s trick; it’s the secret sauce behind juicy steaks, perfectly roasted veggies, and crowd-pleasing platters that all finish on time. If you’ve ever battled with overdone burgers or chicken that’s burnt on the outside and raw inside, grill zones are going to be your new best friend for outdoor cooking.
Understanding the Importance of Heat Management in BBQ
Heat control is essential for BBQ because different foods cook at different rates. Thin pork chops require a quick sear, but what about a big piece of chicken or a thick steak? It needs time and gentle heat to cook through. Sometimes you fire up the grill and hope everything gets done at the same time, but grilling that way can be hit or miss.
Grill zones are your secret weapon for outdoor cooking, offering you the convenience of keeping everything under control. By dividing your grill into separate temperature zones, you can cook a variety of cuts, delicate pieces, and snacks simultaneously. No more running back and forth from the oven to the grill or settling for overcooked veggies because the coals are raging. It’s all in one place, and you’ve got the steering wheel!
With grill zones, you get three significant benefits: better control for even cooking, the flexibility to juggle different foods, and more reliable results every time you fire it up. Whether you’re grilling with gas or charcoal, knowing how to set up grill zones takes your BBQ from “just okay” to really impressive. With these benefits in mind, you can approach your outdoor cooking with confidence and reassurance.
What Are BBQ Grill Zones?
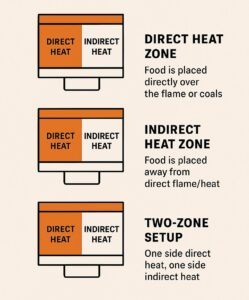
BBQ grill zones are relatively simple yet extremely handy; they’re separate areas on your grill with varying heat levels. You usually hear about “direct” and “indirect” heat. Direct heat is positioned right over the flame or coals, and indirect heat is placed off to the side, where it’s slightly cooler. Cooking with both means you can tackle fast-cooking thin cuts and big, slow-roasted pieces all on the same grate.
Grill zones matter for several reasons. If you want to cook delicate fish and thick sausages together, you don’t want to burn the fish before the sausage is even close to done. Zoning helps you multitask and time everything correctly, which is especially useful for large cookouts or when you have a variety of foods to prepare.
Here’s the cool part: you can use grill zones on both charcoal and gas grills. It’s all about how you set up the heat, like piling the coals on one side, adjusting the burners, or using accessories to shift the flames around. Whatever grill you’re working with, grill zones let you customize it to suit every BBQ session.
Types of Grill Zones
Direct Heat Zone
Direct heat zones are exactly what they sound like: the area of the grate that sits right over the flame or hot coals. This is your high-heat, fast-cook zone. When you throw burgers, hot dogs, or veggie skewers right over the fire, you’re using direct heat.
- What it’s good for: Searing steaks to lock in juices, getting those classic grill marks, toasting buns, crisping skin on chicken, and quickly cooking anything thin or precooked.
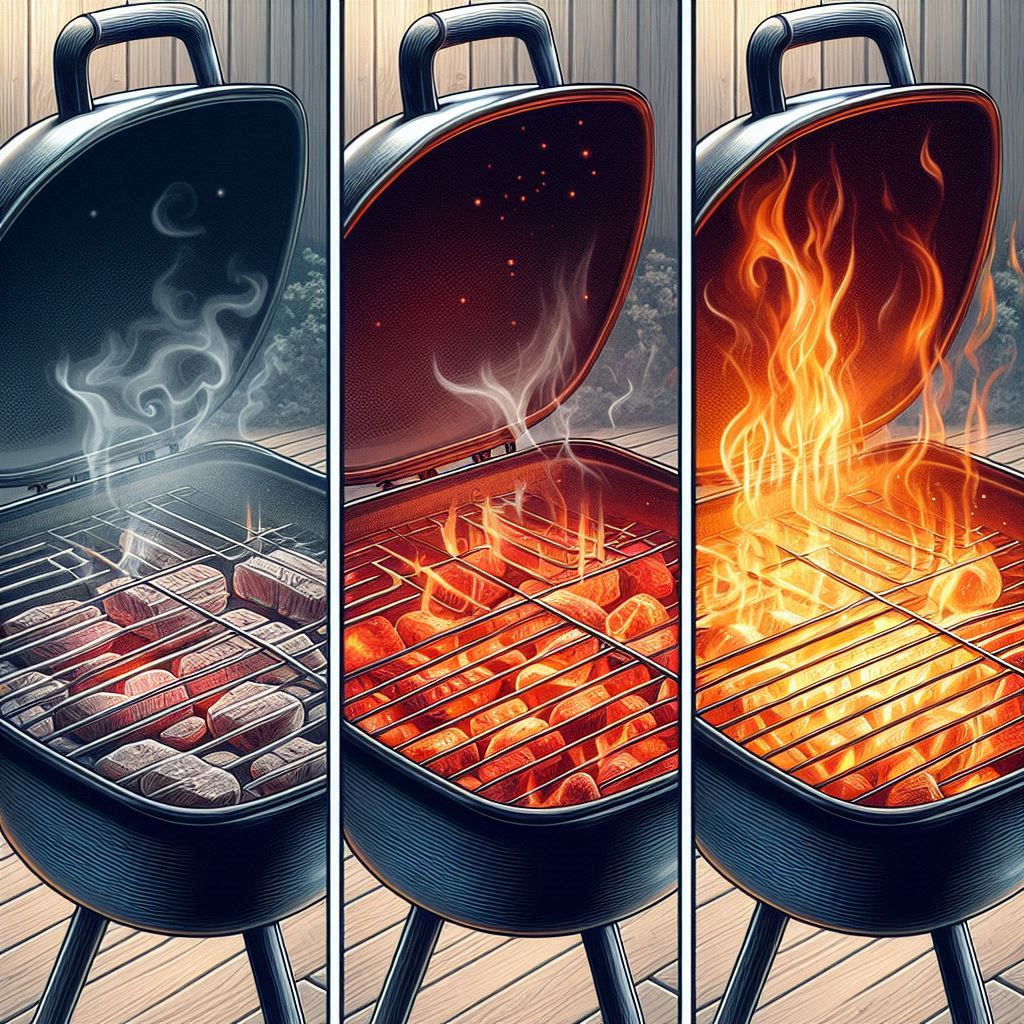
- Best temperature range: Usually around 450-650°F (230-340°C).
Indirect Heat Zone
The indirect heat zone is where you move food away from the hottest part, usually off to the side or above a spot with no coals or burner underneath. This area acts a lot like an oven. Instead of blasting food with intense heat, you’re letting it cook more gently and evenly.
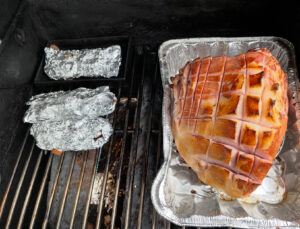
- What it’s suitable for: Roasting whole chickens, smoked ham, cooking large pork shoulders, slow-baking potatoes, and gently finishing thick steaks after searing.
- Best temperature range: Usually around 275-350°F (135-175°C)
Combination / Two-Zone Setup
The two-zone method is a classic approach. You set up half of your grill for direct heat and the other half for indirect heat. That way, you can sear food first, then move it over to the indirect side to finish cooking through. If you’re working with a gas grill, turn the burners on one side to high and leave the other side off or on low. With charcoal, you bunch the coals to one side.
- Why it’s useful: Gives you flexibility to manage the cooking process from start to finish. Lets you avoid burning your food while making sure it’s cooked through.
- Cooking examples: Grill a steak over the direct zone for a crust, then slide it to the indirect side to reach your target temp.
Multizone (Three-Zone Setup)
For next-level control, opt for three zones: high, medium, and no heat. This is perfect when you’re grilling a variety of foods or need a spot for resting meat. You can use high heat for quick sears, medium heat for slower grilling, and a cool zone for keeping bread warm or holding food that has already been cooked. This setup is versatile, especially when you’re cooking for a group with different tastes. It’s time to get creative and experiment with your outdoor cooking!
- Why it rocks: You’re set up to grill, roast, and warm all at once. No more juggling foods on and off the grill.
- Cooking examples: Sear steaks and grill corn over high heat, roast peppers over medium, and stash your garlic bread in the no-heat zone so it doesn’t dry out.
How to Set Up Grill Zones
Setting Up Zones on a Gas Grill
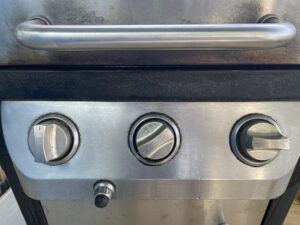
Gas grills are extremely easy to zone. Just use the burners to create different heat levels. Here’s what I usually do:
- Turn one or two burners to high for your direct heat zone.
- Set the other one(s) to low or turn them off for indirect heat.
- Keep the lid closed for best temp control, especially if you’re doing a slow roast.
If you want three zones, set the high setting on one burner, the medium setting on the next, and leave the third burner off for your cool zone. This approach works well for cooking complicated meals or for gatherings where you want to offer a range of grilled options.
Setting Up Zones on a Charcoal Grill
Charcoal grills need a bit more setup, but it’s simple once you get the hang of it. Here’s a classic two-zone charcoal setup:
- Pile your hot coals on one side of the grill. That’s now your direct heat zone.
- Leave the other side coal-free for indirect heat. This works great for roasting or slow finishing.
- For three zones, make a thick pile for high heat, a thin layer for medium heat, and leave one side empty for a cool zone.
Try using a water pan under the indirect side of your charcoal grill to maintain steady temperatures and add moisture, especially during longer cooks like ribs or brisket.
Using Accessories for More Control
- Grill baskets: These are a lifesaver for small or delicate foods, letting you move them easily between zones.
- Heat deflectors: Useful for blocking direct flames and spreading heat more evenly for low and slow BBQ.
- Adjustable grates: Some grills come with adjustable height grates so you can control how close your food is to the heat, giving even more flexibility.
Whichever style you choose, please make sure your grill grate is clean and your zones are preheated before loading the food. Hot grates prevent sticking and ensure good sear marks.
Using Grill Zones While Cooking
Now for the fun part: using those zones to turn out better BBQ. Here’s how you can make it work for you:
- Sear first, finish gently: When grilling steaks or chops, start them over direct heat to get a caramelized crust, then move them to indirect heat to cook through without burning.
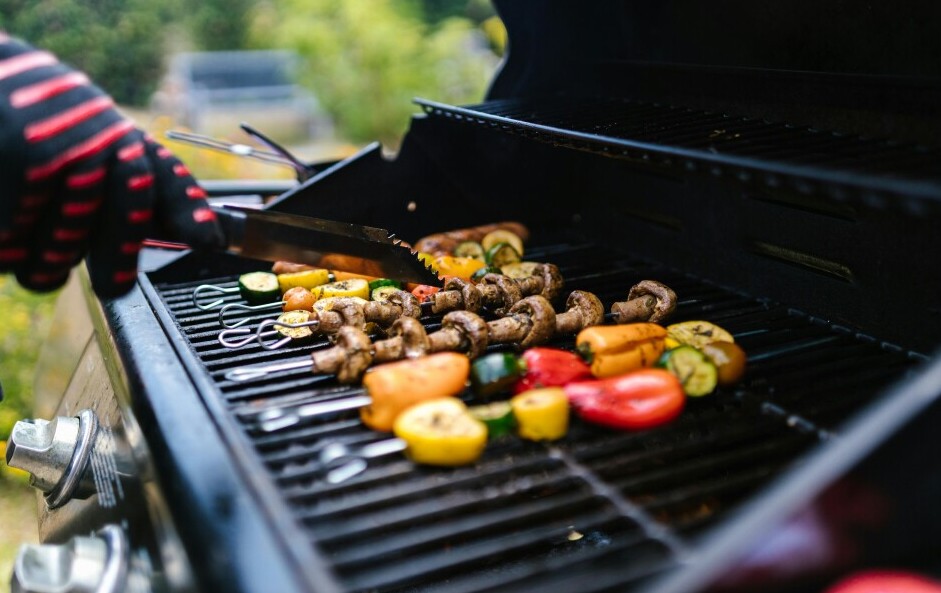
- Protect delicate foods: If you’re grilling fish or tender veggies, keep them on the indirect side so they don’t fall apart or catch fire. For things like shrimp or asparagus, a quick direct heat blast followed by indirect finishing works nicely.
- Use the cool zone for resting: After your meat is cooked, slide it to the cool or no-heat part of the grill. This lets juices redistribute and keeps food warm without drying it out.
For even more control, stagger when you start different foods, using the various zones as needed. For instance, if your steaks require ten minutes and your corn needs fifteen, you can complete both tasks simultaneously by moving them between zones. Don’t be afraid to rotate items—sometimes thicker pieces will need extra indirect time, while thinner items are best with a quick direct finish.
Example Cooking Strategies
- Steak, chicken breast, veggies, and garlic bread: Sear the steaks and chicken breast over high heat, then finish in the indirect zone. Grill the veggies over medium or indirect heat, and warm the bread in the cool zone or on the upper rack.
- Chicken wings: Crisp them fast over direct heat to get lovely skin, then move to indirect heat so they cook through without char.
- Fish fillets and skewers: Start on high to get color, then finish over indirect heat for gentle cooking, keeping them juicy and intact.
Rotating food between zones keeps everything under control. You can bring slow-cooked foods up to temperature safely and stagger the grilling so that side dishes and main meats all finish at the same time. Plus, by using zones, you limit burning and maximize flavor.
Tips & Best Practices
- Always preheat your grill with the lid closed so zones reach target temps before cooking. This stops sticking and helps with grill marks.
- Use a grill-safe thermometer to keep track of the heat in your indirect zone. Surface temps can get hotter than you’d expect, so check in frequently.
- Keep the lid shut as much as possible, especially for indirect cooking; opening it drops the temp fast.
- Don’t be afraid to move food between zones as needed. Sometimes you need to go back and forth to nail perfect doneness.
- Leave a calm or empty zone for stashing food that cooks faster than everything else. It’s convenient for avoiding overcooking if you get distracted.
- Clean your grate before each session, and oil it lightly so food releases easily, keeping those sear lines sharp.
- Try using wood chips on the direct side for extra smoky flavor without overpowering your food. Just place them in a smoker box or wrap in foil with holes poked in it.
Common Mistakes to Avoid
- Cooking everything on direct heat: This usually leads to scorched exteriors and undercooked centers. Managing heat zones prevents that.
- Overcrowding the grill: If you cram everything on, air can’t flow well, and food can steam instead of grilling. Allow each item some space for optimal results and easier flipping.
- Forgetting about carryover cooking: Even after you take meat off the grill, internal temps can rise a few degrees. Move food to a cooler zone or to a plate a little before it hits your target, and it’ll finish perfectly.
- Ignoring wind and weather: Outdoor elements affect grill temperature, so adjust your vents on charcoal or increase burner heat as needed to maintain steady zones.
- Skipping rest time: Always let meat rest in a cool zone or off the grill before slicing to keep it juicy.
BBQ Grill Zones – Mastering Heat Control on the Grill
Grill zones give you way more control than just cranking the dial or dumping more coals. The trick is to use the correct zone for the right food, shuffle items around to get the timing right, and pay attention to how the fire’s behaving.
Mastering grill zones means you’re not just making grilled food; you’re timing an entire meal so everything’s done, tasty, and safe to eat. Think of it like having different burners on a stovetop, but in your backyard. It’s a game-changer for anyone looking to elevate their grilling skills.
Frequently Asked Questions
Here are some of the questions I get most often about setting up grill zones:
Question: Can you use grill zones on a small portable grill?
Answer: Yes! Even on a small grill, you can arrange the heat by piling more coals on one side or turning on fewer burners. You have to keep a closer eye on the temperatures and rotate the food as needed.
Question: How can I prevent food from burning when using direct heat?
Answer: Watch your food closely and flip it as soon as it develops good color. Move it to indirect heat if the outside is browned but the inside still needs more time to cook.
Question: What can I do if my grill gets too hot?
Answer: Adjust your vents (on charcoal grills) or lower the burners (on gas). Move food to a no-heat zone for a minute to cool things down while you reset.
Question: Should I let my grill preheat, and how long does it take?
Answer: It’s crucial to let your grill preheat for at least 10-15 minutes with the lid closed. This ensures the grates are hot enough, food won’t stick, and you’ll get even heat distribution across your zones.
Question: Do zones work for smoking food?
Answer: Absolutely! Indirect zones are perfect for low and slow smoking. Position your wood chips over the heat source and place your food on the cool side, then close the lid to trap all that smoky flavor.
Conclusion
Nailing grill zones isn’t hard once you try it. It just takes a little adjusting and being open to rearranging food. The boost in versatility and consistency is huge. I’ve cooked whole family meals where the steaks, sides, and garlic bread are all done at the same time, hot and ready to go. Experimenting with two or three-zone setups makes every cookout smoother and gives you that grill master confidence.
Try setting up grill zones at your next BBQ, and you’ll see just how much easier outdoor cooking can be. More control, fewer burnt edges, and food that comes out just right. It’s a change you’ll really notice, and your friends and family will thank you!
Enjoy that great BBQ taste!